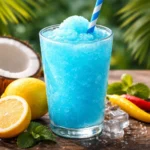
The sun is blazing, the air feels thick, and every sip of water just isn’t cutting through the heat. You’re craving something cold, refreshing, and a little bit fun — the kind of icy treat that instantly cools you down and brings back those summer memories from your favorite slush stand.
But who wants to step outside in this heat just to grab one? Imagine sipping an icy, colorful slushie right from your kitchen—no store run needed! With just a few simple ingredients and a bit of creativity, you can turn your home into your very own frozen drink station. From vibrant fruity flavors to fizzy soda blends, making slushies at home is easier (and way more satisfying) than you think.
Let’s dive into how you can beat the heat and craft the perfect homemade slushie that’s chilled, flavorful, and totally Instagram-worthy.
- What Is a Slushie, Really?
- How To Make a Slushie at Home: Step-by-Step Guide
- Conclusion: Your Homemade Slushie Adventure Awaits
What Is a Slushie, Really?
A slushie is a chilled, semi-frozen drink made by blending ice with flavored syrup, juice, or soda to create a smooth, icy texture that’s both refreshing and fun to sip. Unlike smoothies or milkshakes, slushies don’t rely on dairy or thick ingredients — they’re all about that light, crystalline crunch that melts on your tongue. The magic lies in the balance between ice and flavor, giving each sip a burst of cool sweetness that instantly beats the heat.
Why Homemade Slushies Are Trending
Lately, homemade slushies have become a summertime favorite across kitchens and social media feeds. People love the idea of recreating that classic frozen drink experience without leaving the house. With easy access to compact slushie machines and endless flavor possibilities, more and more slush fans are discovering that DIY versions taste fresher, look brighter, and feel way more rewarding. Plus, crafting your own allows for full control — from flavor intensity to color combinations — turning every batch into a fun, creative experiment.
Benefits of Making Slushies at Home
- Budget-Friendly Cooldowns: A homemade slushie costs a fraction of what you’d pay at a store, especially when making multiple servings.
- Unlimited Flavors: Mix and match syrups, juices, or even sodas to invent your own signature flavors.
- Healthier Options: Skip the artificial additives and use natural fruit juices, low-sugar syrups, or real fruit purees for a guilt-free treat.
- Family Fun: It’s an easy, hands-on activity that kids and adults both enjoy — perfect for parties or lazy weekends.
How To Make a Slushie at Home: Step-by-Step Guide
Ingredients You’ll Need
Creating the perfect slushie starts with just a handful of simple ingredients. Each one plays a role in flavor, color, and that signature icy texture.
1. Ice
The heart of every slushie. Crushed or cubed ice gives the drink its frosty texture. For smoother results, use soft ice or blend until fine and even.
2. Slush Syrup or Juice
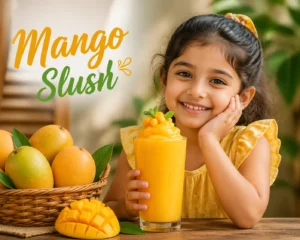
This is where the flavor magic happens! Choose from ready-made slush syrups or use natural fruit juices for a homemade twist. Popular picks include blue raspberry, cola, strawberry, and mango.
3. Sugar (Optional)
Enhances sweetness and helps improve the texture by slowing down how fast the ice melts. If you’re using sweetened syrup, you can skip it.
4. Food Coloring (Optional)
A few drops can make your slushie look more vibrant and appealing — especially when layering different flavors.
5. Flavor Extracts or Concentrates
For a stronger, more distinct taste, try adding a drop of lemon, mint, or fruit extract. Great for customizing your drink and experimenting with new blends.
6. Water or Soda Base
Dilutes the syrup and gives the mixture a balanced texture. Using soda adds fizz for an extra fun twist!
Equipment for Making Slushies at Home
Making a perfect slushie isn’t just about the ingredients — it’s also about using the right tools to get that smooth, icy texture. Here’s what you’ll need to turn your kitchen into a mini slushie bar:
1. Slushie Machine (Optional)
The easiest and most consistent way to make slushies. These machines freeze and stir the mixture simultaneously, giving you that perfect store-style texture — smooth, icy, and drinkable.
2. Blender (Optional)
If you don’t have a slushie machine, a strong blender can do the job. Just blend ice with your chosen syrup or juice until it reaches a semi-frozen consistency.
3. Ice Crusher or Food Processor (Optional)
Ideal for crushing ice into small, uniform pieces before mixing with flavoring. This helps achieve that signature slushie crunch without large ice chunks.
4. Measuring Cups and Spoons
Accurate measurements of syrup, sugar, and liquids ensure your slushie tastes just right — not too sweet, not too diluted.
5. Slushie Cups and Straws
The right presentation makes a difference! Use clear cups and colorful straws to show off your drink’s bright layers and make it feel like a real treat.
Different Ways to Make a Slushie at Home
There’s no single right way to make a slushie — it all depends on the tools you have and how hands-on you want to be. Whether you own a dedicated slushie machine, prefer using a blender, or want a quick no-blender method, each technique has its own charm, convenience, and texture. Below, we’ll explore how each method works, why people use it, and what its advantages and limitations are.
Slushie with a Machine
Using a slushie machine is the most efficient and professional way to make slushies, especially if you want consistent texture and perfect ice-to-flavor balance. These machines work by continuously stirring and freezing the liquid mixture until it forms that iconic semi-frozen, fluffy consistency.
How it works:
You pour your flavored slush syrup and water mixture into the machine’s tank, adjust the freeze settings, and let the built-in refrigeration system and rotating blades do the rest. Within 20–40 minutes, you’ll have a smooth, ready-to-serve slushie.
Why use it:
A slushie machine is ideal for those who make slushies frequently — whether at home for family fun, parties, or small businesses. It provides consistency in texture, color, and taste that’s hard to achieve manually.
Pros:
- Produces commercial-quality slushies.
- Can make large batches at once.
- Easy to operate once set up.
- Consistent freezing and texture.
Cons:
- Requires a higher upfront investment.
- Needs cleaning and regular maintenance.
- Takes up counter space.
- Longer prep and cooling time compared to blenders.
In short, a slushie machine is perfect for enthusiasts who want the real deal — just like the ones you get at fairs and cafes.
Slushie with a Blender
Making slushies with a blender is the most popular home-friendly option. It’s quick, affordable, and gives you flexibility to experiment with flavor combinations and texture.
How it works:
You simply add ice cubes and your liquid base (flavored syrup, juice, or soda) into the blender, then pulse until the ice breaks down into a slushy, drinkable texture. Adjust the blend time to control how fine or chunky your ice is.
Why use it:
Blenders are easy to find in any kitchen, making them the go-to option for quick homemade slushies. This method is great for one or two servings and offers instant gratification without special equipment.
Pros:
- Fast and simple process.
- No specialized machine required.
- Easy to clean and store.
- Total control over thickness and flavor intensity.
Cons:
- Texture may vary depending on the blender’s power.
- Ice can melt faster if over-blended.
- Not ideal for serving large groups.
- Some blenders struggle with crushing large ice cubes evenly.
Blender slushies are the perfect balance between convenience and customization — a great choice for casual slushie lovers.
Slushie Without a Blender
No blender? No problem. You can still make a refreshing slushie using simple freezing techniques — all you need is a freezer, a resealable bag, or a shallow dish.
How it works:
Pour your flavored drink mix into a freezer-safe container and place it in the freezer. Every 20–30 minutes, stir or scrape it with a fork to break up the forming ice crystals. Repeat until you reach a semi-frozen, grainy texture similar to a granita or slushie.
Why use it:
This method is great when you don’t have access to a blender or machine. It’s quiet, low-effort, and produces a unique texture that’s somewhere between shaved ice and a frozen drink.
Pros:
- Requires no special equipment.
- Easy and inexpensive method.
- Produces a unique, crunchy texture.
- Ideal for small batches or kids’ experiments.
Cons:
- Takes longer — usually 2–3 hours.
- Requires occasional stirring during freezing.
- Texture is coarser than machine-made slushies.
- Limited to small portions.
While it’s slower, the no-blender approach is surprisingly rewarding — perfect for those who enjoy the DIY experience and want to make slushies with minimal gear.
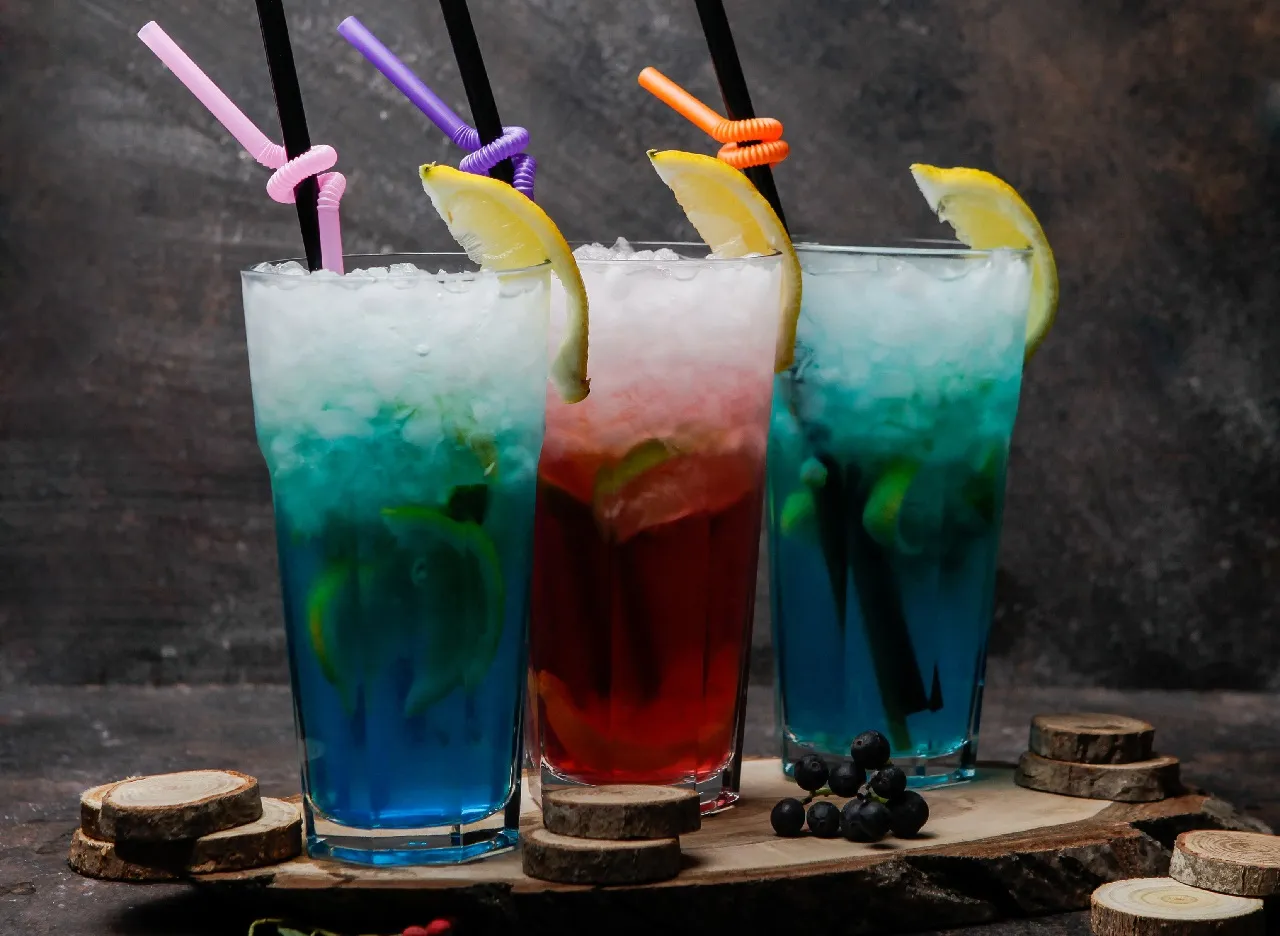
Creative Slushie Recipes for Home
Slushies aren’t just icy drinks — they’re a burst of creativity in a cup. Once you know the basics, you can mix, match, and experiment with endless flavors right from your kitchen. Below are three fun and versatile ways to make slushies at home using everyday ingredients — soda, fruits, and flavored syrups. Each method brings a unique twist, so pick your favorite or try them all!
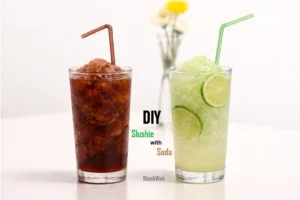
Soda slushies
A soda slushie is the quickest and most refreshing option — perfect for a fizzy, carbonated chill. Whether you use cola, lemon-lime, or an orange drink, the carbonation gives your slushie a light and bubbly texture that’s hard to resist.
| Method | How to Make |
| Using Slushie Machine | 1. Pour chilled soda into the machine. 2. Let it churn 15–20 minutes until icy crystals form. 3. Serve immediately for best fizz. |
| Using Blender | 1. Add cold soda + ice cubes to blender. 2. Pulse lightly (short bursts) to maintain carbonation. 3. Stop once you get a light, bubbly slush texture. Click here to explore our Slushie with Blender method in detail. |
| Without Blender | 1. Pour soda into a shallow freezer tray. 2. Freeze for 2–3 hours, stirring every 30–40 minutes. 3. Scrape crystals with a fork to achieve slush consistency. Click here to explore our Bowl-in-Bowl Slushie Method (No Blender Needed). |
Tips & Precautions:
- Avoid over-freezing — soda expands, and the carbonation can cause spills or bursts if tightly sealed.
- Use freshly opened soda for better fizz retention.
- Serve in a chilled glass to keep the slushie from melting too fast.
Fruit Slushies
Fruit slushies are the perfect mix of natural sweetness and refreshment. You can use any fruit you like — from juicy strawberries and mangoes to citrus or berries. They’re naturally colorful and can be made healthier with minimal sugar or added ice.
| Method | How to Make |
| Using Slushie Machine | 1. Prepare a fruit puree (blend fruits with a bit of water). 2. Pour into the machine and churn until semi-frozen. 3. Add a squeeze of lemon for balanced flavor. |
| Using Blender | 1. Wash and freeze fruits (like mango, strawberry, or watermelon). 2. Add ice and a splash of juice or water. 3. Blend until thick and smooth. Click here to explore our Slushie with Blender method in detail. |
| Without Blender | 1. Mash soft fruits with a fork or whisk. 2. Mix with crushed ice and stir well. 3. Add a bit of cold juice for better consistency. Click here to explore our Bowl-in-Bowl Slushie Method (No Blender Needed). |
Tips & Precautions:
- Always wash and dry fruits properly before freezing — good hygiene ensures freshness and safety.
- Balance sweet and tangy fruits for better flavor (e.g., mix mango with lemon or strawberry with orange).
- Use crushed ice instead of whole cubes for smoother texture.
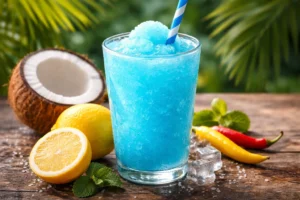
Syrup Slushies
Syrup slushies are all about bold colors and classic sweetness — think of those iconic slushie machines at fun fairs! Using syrup makes it easy to achieve that authentic taste and texture without needing fresh fruit.
| Method | How to Make |
| Using Slushie Machine | 1. Mix 1 part syrup with 4–5 parts water. 2. Pour into the machine and churn until light and fluffy. 3. Serve immediately for best texture. |
| Using Blender | 1. Combine syrup, cold water, and ice in a blender. 2. Blend until you get a smooth, icy texture. 3. Avoid over-blending to prevent melting. Click here to explore our Slushie with Blender method in detail. |
| Without Blender | 1. Pour syrup-water mix over crushed ice. 2. Stir continuously until evenly coated. 3. Add more syrup for stronger flavor. Click here to explore our Bowl-in-Bowl Slushie Method (No Blender Needed). |
Tips & Precautions:
- Use food-safe, quality syrups to ensure color and flavor consistency.
- Don’t over-blend — it can melt the ice too much and make it watery.
- Keep syrup bottles sealed and stored in a cool place to maintain flavor.
Avoid These Slushie Slip-Ups
Even the simplest slushie can go wrong if you skip a step or rush the process. Here are the most common mistakes people make when crafting slushies at home — and what happens when they do.
| Mistake | Downside / Result |
| Overfreezing the mixture | The slushie becomes solid ice instead of smooth crystals — you lose that soft, sippable texture. |
| Over-blending with a blender | Too much blending generates heat, melting the ice and turning your slushie watery instead of frosty. |
| Using warm soda or syrup | It prevents proper freezing and reduces the “fluffiness” of your slushie; carbonation also disappears. |
| Not washing fruits before use | Dirt, wax, or pesticide residues affect flavor and hygiene, making the drink unsafe and less fresh-tasting. |
| Adding too much liquid | Excess water or juice dilutes the flavor and prevents ice from forming properly. |
| Using stale or unchilled ingredients | Room-temperature syrups, juices, or sodas take longer to freeze and can create uneven ice crystals. |
| Not cleaning machines or blenders properly | Old residue mixes with new flavors, causes bad taste, and can lead to bacterial contamination. |
| Delaying serving after preparation | Slushies melt quickly; waiting too long turns your frozen treat into a sugary drink puddle. |
Cost Comparison – Store-Bought vs Homemade
Making slushies at home doesn’t just give you creative control — it also saves money in the long run. A single store-bought slushie might seem cheap, but frequent purchases quickly add up.
| Type | Average Cost (per serving) | Key Notes |
| Store-Bought Slushie | $2.50 – $4.00 | Includes packaging, branding, and retail markup. Limited flavor choice and often high in sugar or additives. |
| Homemade Slushie | $0.80 – $1.50 | Cost depends on ingredients (soda, syrup, or fruit). No preservatives, customizable, and healthier options possible. |
Example:
If you enjoy three slushies a week:
- Store-bought: ≈ $9 – $12
- Homemade: ≈ $2.40 – $4.50
That’s a savings of up to 65% every week — and even more if you already own a blender or slush machine.
Conclusion: Your Homemade Slushie Adventure Awaits
Making a slushie at home isn’t just about blending ice and flavor — it’s about creativity, refreshment, and pure fun in a cup. Whether you’re whipping up a bubbly soda slushie, a fruity tropical mix, or a colorful syrup-based treat, every method lets you customize taste, sweetness, and texture exactly how you like it. Plus, by using clean, quality ingredients and a bit of technique, you can enjoy a café-style frozen drink right from your kitchen, anytime.
With a small investment in the right tools — a reliable slushie machine, blender, or even a simple freezer setup — you can turn ordinary days into cool, flavor-filled moments. Homemade slushies are cheaper, healthier, and more satisfying than store-bought alternatives. So grab your favorite flavors, chill your ice, and start experimenting. Your homemade slushie adventure starts today — and with every sip, you’ll taste the difference that freshness and creativity bring.